

Key Takeaways
Why Most Garage Organization Attempts Fail
The garage is where organization goes to die for most families. Items get stashed there with good intentions — a temporary home until a better solution appears — and years later, entire sections of floor space become impassable. The reason most cleanup attempts don't stick isn't a lack of effort; it's the absence of a deliberate system built around how your family actually uses the space.
Before moving a single bin, it helps to think of your garage as a series of zones rather than one large holding area. A garage might serve as tool storage, sports equipment hub, seasonal décor archive, lawn care center, and car parking — all at once. Treating those as separate functional areas, each with dedicated storage, changes how you approach the project. This guide is part of a broader approach covered in our room-by-room home organization checklist for families who want to tackle the whole house systematically.
What you will need
Tools and Supplies You'll Need
Gather your supplies before you begin. Having everything on hand prevents mid-project trips to the store that stall momentum.
Heavy-duty shelving units
Provide stable, tiered storage for bins, equipment, and bulky items along garage walls.
Pegboard with hooks
Mount hand tools, garden implements, and frequently used accessories on visible, accessible wall panels.
Clear or open-front storage bins (assorted sizes)
Contain and categorize items within each zone while keeping contents visible.
Label maker or waterproof labels
Clearly identify bin contents and zone boundaries to support consistent return habits.
Wall-mounted bike hooks or rack
Lift bikes off the floor and free up significant ground space in active household garages.
Overhead ceiling storage rack
Utilize ceiling space for bulky, lightweight seasonal items like camping gear or holiday décor totes.
Drill, stud finder, and hardware
Required for safely anchoring shelving units and wall-mounted systems into studs.
Step-by-Step: Building a System That Lasts
Follow these steps in order. Skipping ahead to shelving or bin purchases before completing the purge and zone-mapping phases is one of the most common mistakes — and one of the most expensive.
Empty and Purge Before You Plan
Pull everything out of the garage — onto the driveway if weather allows. Sort into four categories: keep, donate, trash, and relocate (items that belong elsewhere in the house). Be honest during this stage. Duplicates, broken tools, and gear that hasn't been touched in two or more years are candidates for removal. Donating functional items to local organizations or posting them through neighborhood exchange groups prevents waste.
Map Out Functional Zones
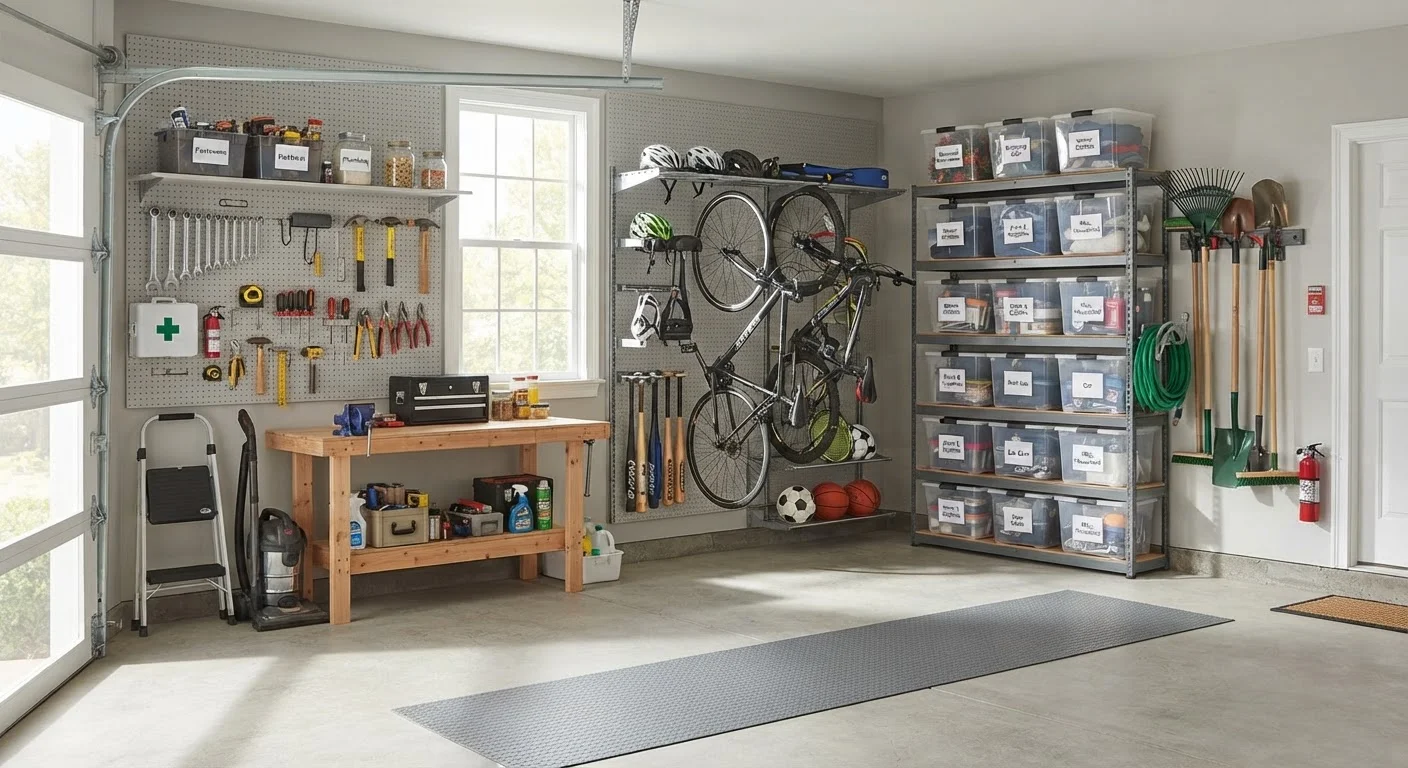
Sketch a rough layout of your garage on paper. Assign zones based on how your family uses the space. Common zones include: automotive (car care, fluids, jumper cables), lawn and garden (mowers, fertilizers, hand tools), sports and recreation (bikes, balls, helmets), seasonal storage (holiday décor, camping gear), and a workshop area if applicable. Place high-frequency zones nearest the entry point, and low-frequency storage — like holiday bins — toward the back or overhead.
Maximize Vertical Wall Space
Floor space is premium; walls are often completely ignored. Install a combination of pegboards, wall-mounted tracks with adjustable hooks, and fixed shelving at multiple heights. Pegboards work well for hand tools and garden implements. Heavy-duty wall tracks accommodate bikes, ladders, and larger gear. Shelving positioned above car hood height (roughly 5–6 feet) keeps items accessible without blocking vehicle access. Use the highest shelves for items accessed once or twice a year.
Choose Containers and Label Everything
Use clear or open-front bins where possible so contents are visible without opening lids. Uniform bin sizes stack more efficiently. Label every container — not just categories ("sports") but specific contents ("soccer: balls, shin guards, pump"). For households with children, consider picture labels on lower bins. Labeled systems dramatically reduce the time spent searching and, more importantly, increase the likelihood that family members return items to the correct place.
Establish a Seasonal Rotation Schedule
Designate a specific shelf or overhead area for off-season gear. In spring, move winter holiday bins to back storage and bring lawn and garden equipment forward. Reverse in fall. Putting dates on your calendar for these swaps — rather than waiting until overcrowding forces it — keeps the zones clean year-round. If you compost yard waste, keeping a designated spot near the garage entry for compost-related tools makes it easier to maintain that habit; see our guide to composting at home for a complementary approach to managing yard materials.
Start Small if the Project Feels Overwhelming
If tackling the entire garage at once feels unmanageable, choose one zone — the sports equipment area or the lawn care section — and complete it fully before moving to the next. A finished zone builds momentum and gives you a tangible model for the rest of the space. Partial organization that actually gets used beats a perfect plan that never gets executed.
Maintaining the System Over Time
An organized garage requires a maintenance rhythm, not a one-time overhaul. Build two habits into your household routine: a quick return rule (everything goes back to its zone the same day it's used) and a seasonal review. Pairing your garage walkthrough with the broader framework in our seasonal home organization quarterly guide makes it easier to rotate items like holiday bins and lawn equipment without creating new clutter piles.
If different family members have different standards for tidiness in shared spaces, the systems that work best tend to be visual and low-effort — labeled open bins rather than lidded boxes, zones marked with floor tape or signage, and parking spots for bikes or tools outlined on the wall. Our article on organizing a home when family members disagree covers strategies for making shared systems stick.
Avoid Storing Hazardous Materials Near Living Areas
Pesticides, fertilizers, pool chemicals, and automotive fluids should be stored in a locked cabinet and never mixed or stored near each other — some combinations create dangerous reactions. Review the product labels for specific storage guidance, and keep these items entirely out of reach of children and pets. When in doubt about safe disposal of old chemicals, contact your local household hazardous waste program.